Feeds:
Posts
Comments

Several months ago, I watched the documentary The Beauty Academy of Kabul. This doc details how some American and Afghan-American cosmetologists traveled to post-Taliban Afghanistan to open a beauty school. The response by the local women was overwhelming: They virtually knocked down the academy’s door for the opportunity to learn hair-cutting and styling, makeup application and other beauty skills.

Under the Taliban rule, extravagances such as makeup and perms were forbidden. (Apparently this wasn’t strictly enforced. One of the women tells of cowering when a Taliban officer came knocking at her door at night; turns out he was just bringing his wife by to get a perm.) With the fall of the regime, women who have practiced beauty arts in secret finally have the chance to make an economic difference in their families. One hairstylist says that she can make more money preparing a bride for a wedding than her husband makes in a whole month.

Sadly, the academy didn’t last. Like many worthwhile endeavors, they had passion but not enough money.

The memory of this movie has been germinating in my mind, and last week, I found an outlet, a way I could help women struggling to support their families with their skills: microloans. Very small loans have the potential to empower women and reduce poverty by giving not a handout but credit to entrepreneurs to start or expand businesses (see: “Poverty Reduction: A little credit goes a long way“).

The Web site kiva.org offers investors the chance to pick individual entrepreneurs to lend to in increments as small as $25. So, I looked through the profiles, and I chose Adoudé Akue-Goeh, a seamstress in Togo, a small country in West Africa. I and 34 other investors provided her the working capital to buy materials and further her business…and beginning April 15, 2009, she will begin to pay us back.

To learn more about kiva.org and microfinance, click the graphic below.


Kiva - loans that change lives

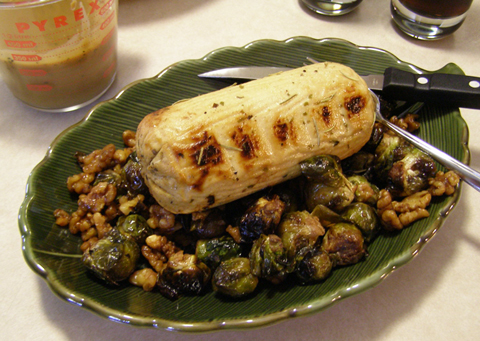
Wow, it’s been almost a month since I’ve updated the blog here. Oops. Well, I hope everyone had a tasty and relatively drama-free Thanksgiving. Our feast included a meat-free Quorn roast on a bed of Brussels sprouts and walnuts:

quorn

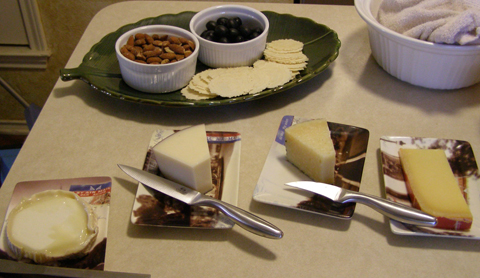
Looks delish, doesn’t it? Sorry, I’ve eaten it all… I also whipped up a small cheese tasting:

cheeses

L to R: Boucherondin, Drunken Goat, Year-old Manchego and Parrano

Beautywise, I’ve been occupying myself with swapping on MakeupAlley.com. Though the site has been around since 1999, I didn’t sign up and start swapping until a couple of months ago. Though my husband is convinced I’m going to end up with strangers’ cooties, so far the experience has been positive and has been an excellent outlet for my product junkie tendencies.

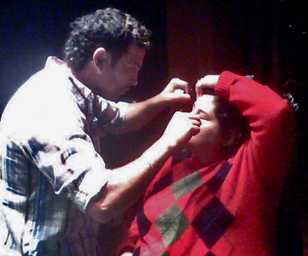
Another first for me is threading. Let me tell you a little story: In the summer of 2004, I stopped at a Professionail in a local mall to have my fake fingernails removed. While the nail tech was ripping those off (little did I know then I should have asked her to soak them off), she looked me square in the face and said, “Eyebrow wax, $8?” It’s a sign when an cosmetologist looks at your face and suggests a wax, I thought. It wasn’t my first eyebrow wax, but when I woke up the following morning with my forehead and brow area so inflamed that my eyes were practically swollen shut, I decided it would be my last.

I never figured out what caused the allergic reaction, but for the past four years, I have tried to maintain my brows through plucking only, which to me, doesn’t give as clean and groomed a look as waxing. So when a co-worker mentioned she was going to get her brows threaded, I jumped at the chance to try out this hair removal process.

threading

Photo by Brittan

My co-worker Brittan snapped this photo with her phone while the slightly surly threader was working his magic. I have a low pain threshold (when I say that, I always think back to Erma Bombeck joking that her pain tolerance was so low she was bedridden for two weeks after getting her ears pierced), so I was afraid I would tear up or wince during the threading process. But it was surprisingly painless–to me, even more comfortable than plucking.

My fall and winter shaving routine is quite lax, so I’m sure if David (the threader) had spotted my pits and legs, he would’ve wanted to reach for his industrial-size spool. Am I the only one that surrenders to the hair during long-sleeves season?

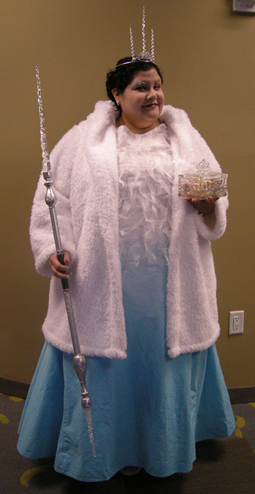
Hope you had a great Halloween! I rocked three different costumes for different events (The White Witch for work on Friday, snake charmer for a Friday night party and gothy vampire for a Saturday night party) and am officially tired of making costumes.

But now that Pumpkin Day has passed, that means Halloween decor, costumes and—most important—beauty products are probably 50% off (or more) at your local discount and drug stores.

The best finds:

LASHES

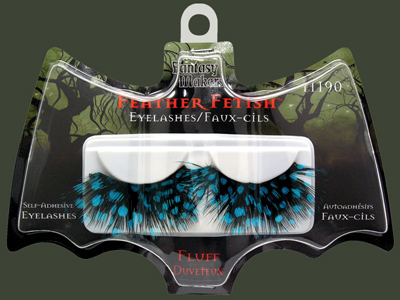
If you love false eyelashes, you can outfit your own Lash Bar for just a few bucks: The array of lashes I’ve seen this Halloween is dizzying, from metallics to crystal-studded to feather-accented. Why spend $50 on a pair from Shu Uemura when you can pick these up for less than $5?

NAIL POLISHES & NAILS

Polishes in blood red, black and glow in the dark are dirt cheap right now. Also easy to find as inexpensive press-on nails—I picked up a set of “dragon lady” nails in a black cherry shade with rhinestones at the tips for 99 cents.

WET ‘N’ WILD FANTASY MAKERS

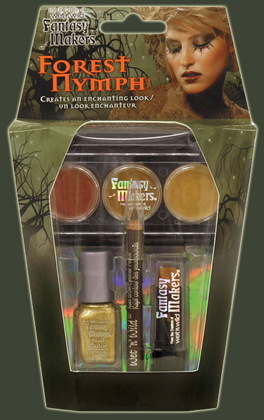
These cute little sets are packaged as costume themes such “Starlet” and “Red Devil.” Each kit has four products, including mini lipsticks, mini nail polishes, false lashes, fake tattoos, eyeshadows and other goodies.

The two kits I think are really worth looking for are “Black Pearl” and “Forest Nymph.” The Black Pearl kit includes a temporary skull-and-bones tattoo, a black nail polish and faux lashes, but the best item is the Skull Gloss Ring. The plastic skull flips open to reveal a creamy, nicely pigmented black lip gloss. Perfect for a vampire costume, but also perfectly on trend for fall (try layering over a red stain for a little less of a goth look).

The Forest Nymph set is a very wearable set of gold nail polish, gold lipstick, brown eyeliner and, my favorite, a trio of shimmer cream colors (wheat gold, dark gold and copper) that could easily work for eyes and cheeks. The packaging is lightweight and flimsy, but the colors are attractive and buildable.

Each of these kits was available for less than $5 at my local Walmart.

Since I have the beauty regimen figured out, I have begun constructing the remainder of my Jadis the White Witch costume. Although inspired by the Disney movie costume, my costume is my own interpretation and not an exact rendering.narnia2

The Dress

According to Narnia Web’s The Wardrobe Door, the White Witch’s dress as seen in the “Turkish Delight” and “Ice Castle” scenes in the Disney film is three layers: dyed velvet, felted wool and silk, and lace. While the dress is gorgeous, I don’t have the time or skill to make a dress with the construction or silhouette. (If you do have the time and interest in being this detailed, visit the Wardrobe Door Web site for further construction tips.)

I couldn’t find a pattern that matched the silhouette but was also simple to sew (if time is not a factor for you, I saw several bridal gown patterns that could be adapted for a more sophisticated costume), so I chose Burda pattern no. 7977, which is a simple, medieval-type long gown. The pattern is suited for womens’ sizes 10-24.

The fabric of choice is a white 100% cotton—cheap ($2.49/yd at Wal-Mart) and easy to work with. Jadis’ gown has short sleeves, but in cutting out the pattern, I opted to make the garment sleeveless for two reasons: 1) simplicity, and 2) my “fur” coat will be warm enough as it is. Removing the sleeves made it necessary to adjust the armholes, which I did by trimming closer to the neckline at the top of the armhole and adding darts to take in the excess fabric around the bottom of the armhole. I also cut the neck to more of a boatneck than the original pattern.

The back of the dress called for lacing; the pattern suggested buttonholes, but I did grommets, which was fun but time-consuming. I used a nubby white yarn for the laces because I already had it on hand and I thought it looked kind of whimsical.

Yesterday, I dip-dyed the dress with Dylon Permanent Fabric Dye in Light Blue (3 packets) and Carribean Blue (2 packets). I mixed up the dye in a plastic bin in my bathtub and dipped the bottom two-thirds of the dress in and out of the dye for about 30-45 minutes. This yielded a nice ombre effect, with a dark ice blue at the bottom to white from the bustline up. The packet’s instructions to wear rubber gloves should be heeded; my hands looked frostbitten by the end of the dye session.

While watching SNL (this weekend’s episode, for once, was actually funny), I cut rectangles of organza into ragged icicle shapes (bissect a rectangle on the diagonal and you end up with two triangles; see, geometry will help you make Halloween costumes). With Aleene’s Fabric Fusion glue, I attached the base of each icicle to the bodice of the dress.

NOTE: I toyed with the idea of doing a second layer that approximated felted wool, but I ran out of time to complete that part. Hobbs Heirloom Cotton Batting stretches and clumps kind of like wool and takes dye well (it was a lovely shade of blue after less than 20 minutes in the dye bath). If you want to make the felted layer, this batting would be a cheap place to start.

THE FUR CAPE

I don’t wear real fur, so that was out of the question. I found a sumptuous floor-length faux fur cape on eBay, but I had to pass since it’s $399! Another idea I had was to adapt a faux fur throw into a cape, but I couldn’t find one in the right color with the texture I wanted (a mink-pelt look). I looked at the faux fur at the fabric store and didn’t find anything promising there.

So for $15, I picked up a white furry bathrobe at Garden Ridge Pottery. The robe has thread of sparkly plastic woven into it, giving it the look of freshly fallen snow. So, OK, it doesn’t exactly look like fur, but I think it’s acceptable for the price.

THE WAND

An amazing-looking replica of the White Witch’s wand is available on several Web sites for $200+. If you have the means to buy that, you’re set. If not, here’s what I did. Again, this is more an “interpretation” of the wand than an exact duplication.

I purchased two unpainted wooden candlesticks from Michael’s, a craft store. The bottom flange unscrews, and I trimmed the candlestick down further so that they fit relatively flush on each end of a 18-inch-long dowel rod. (I attached the candlesticks to the dowel by drilling out holes in each piece and gluing a section of smaller dowel into the holes.) I didn’t sand or prime the wand before applying several coats of silver spray paint—but now I wish I had because it would have had a shinier chrome appearance.

The black hand grip is painted on (though my husband suggested a higher-end look could be achieved with black leather) and the silver swirls details are built up with squeezable fabric paint (what we used to call “puff paint” in my ’80s youth).

If you’re making your costume in the later half of October, you will probably be able to find acrylic icicles in the Christmas section of craft and department stores. I found several sizes of icicles at Garden Ridge. The icicles are secured in the cups of the candlesticks with lots of glue (this technique didn’t work as well as I hoped; the glue didn’t fully set for almost 2 days, and you can see that one of the icicles is askew in the photo above).

THE CROWN

On the hunt for a cheap tiara, I stopped at Claire’s. I was looking for one with open scrollwork on the front that would allow me to lash icicles to it. I almost paid $16 for a “prom” tiara, but then I saw the kids’ dress-up tiaras, which were simpler, with cheaper rhinestones, but still metal and only $5. Sold. I attached three of the plastic icicles to the front with small zip-ties. Then I painted the zip-ties silver.

TURKISH DELIGHT

What White Witch costume would be complete without that tempting treat? I ordered the Locoum Delights from Liberty Orchards (get the value pack under “Personal Treats” if you’re looking for a cheap option), which includes four flavors of Turkish Delight. I put the candy in a glass candy dish decorated with a snowflake pattern.

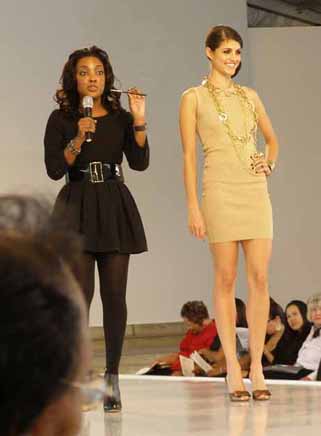
As part of NorthPark Center’s Fashion at the Park, I had the chance to attend an event called “Bobbi Brown: Runway to Reality” in a private meeting space at Nordstrom. The title was a misnomer, as the event didn’t focus on converting extravagant runway looks to everday looks. Instead, the demonstration—led by Suemar Dawson, a Bobbi Brown artist who often works directly with Brown herself—centered on The 10-Step Beauty Guide. Using an audience member as a model, Dawson led us through creating a basic, neutral look.
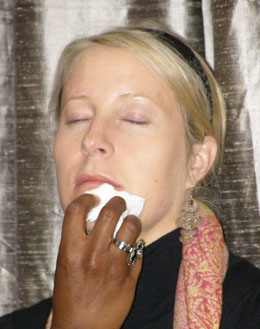
Bobbi Brown artists prepare the model's face for makeup application.

Bobbi Brown artists prepare the model.

Sounds deceptively simple, but I actually learned a lot. The setting was intimate (fewer than 30 other women) and we were encouraged to ask questions. Dawson said the Bobbi Brown philosophy relies on “simplified” products (such as moisturizers with built-in primers and anti-aging lipsticks) and the idea that the makeup looks natural enough that “you should be able to stop at any step.” If you don’t have time for all 10 steps, Brown suggests concealer, blush and lip gloss as the top three for a “instantly pulled-together look.”

Pre-Makeup

The seminar began with the admonishment that a lipstick or eyeshadow probably won’t change your life—but proper hydration can. Extra Face Oil, for instance, can add a soothing boost when layered over your everyday moisturizer. This oil is not slick but is “dry,” absorbs quickly and has a herbal/lavender scent. Dawson said, chuckling, that she thinks of Hydrating Eye Cream, which has a built-in primer, as the “Spanx of cosmetics”—lifting, defining, hiding flaws. The eye cream provides a smooth base for the next step, correction and concealing.

Step 1: Concealer

I have always thought a yellow-based concealer should go directly on bluish undereye circles, but Dawson said that the combination (blue + yellow) can simply give the undereye a greenish tint. For dark circles, start instead with a pink-toned corrector and then follow with a yellow-based concealer for best coverage.

“Concealer is the secret to the makeup universe,” said Dawson, and indeed, she spent the most time on the concealer step of the demonstration. According to Bobbi Brown, undereye concealer should be one shade lighter than the surrounding skin. (Again, my misconception had been that concealer should exactly match the skin.) Dawson said the brightest spot on the face should be the browbone and the second brightest the undereye area, hence the need for a slightly lighter concealer. When choosing a concealer, Dawson tells makeup artists to select the shade they’re scared of—that is, the one that looks a bit too light.

Step 2: Foundation

I’ve never known whether it’s better to use your fingers, a sponge or a foundation brush. Dawson suggests that for dry skin, finger application is best because it warms up the foundation and adds a bit of oil from the fingers. For oily skin, sponge application helps keep finger oils from getting on the face. She says that she then likes to finish with a brush to blend in foundation.

Using a full-coverage foundation over the entire face creates too much of a masklike effect, said Dawson. She recommended foundation layering: start with a tinted moisturizer/sheer foundation and then go back and hit any trouble spots with a Foundation Stick or Blemish Stick.

Step 3: Powder

Fortunately, the Creamy Concealer Kit includes matching powder to set the concealer for longer wear. Dawson suggests that the rest of the face should only be powdered in oily spots (not the cheeks) for a more natural glow.
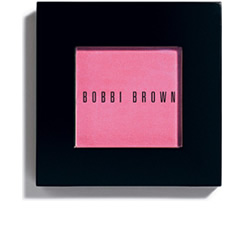
Some Bobbi Brown blushes look Barbie-like in the compact.

Some Bobbi Brown blushes look Barbie-like in the compact.

Step 4: Blush

I tend toward earthy shades when I choose blush. Never would I think of picking up Bobbi Brown’s Pale Pink Blush, which in the compact looks like a neon Barbie color. What’s amazing is that both the model (fair-skinned blonde) and Dawson (African-American brunette) were wearing the shade, and it looked great on both of them!

Step 5: Lipstick/Gloss

Bobbi Brown just released a new Lip System, which is a colorwheel that helps choose your perfect lipcolors based on, well, your natural lip color.  Dawson touted the Creamy Lipcolor, which she said has anti-aging ingredients. (The cost of the event included a lipstick of our choice: I selected Creamy Lipcolor in Baby.)

Step 6: Lipliner

Dawson said it’s OK to not use lip liner in your everyday look, as long as you don’t have concerns about feathering. If lipstick feathering is a problem, she suggested using both a lip liner and also patting a ring of foundation right around the edge of your lips.

Step 7: Brows

The two most common brow problems Dawson encounters are thin, over-tweezed brows and “the tadpole,” a brow that’s thick near the nose but trails sharply down to nothing. Brow pencils aren’t Dawson’s favorite, because they are often too creamy and will “melt” off too quickly. (Dawson says Bobbi is developing a pencil that has a powdery texture that would be appropriate). Any of the regular eyeshadows, applied with an angled brush can work for brows. She recommends cooler shades for every skin tone (rather than warm or reddish shades) and says that blondes can even use gray shadow.

Step 8: Eye Shadow

Sorry to say, most of Bobbi Brown’s eye shadows do nothing for me, since I like crazy, glittery MAC colors. If you’re into the muted palette of Bobbi Brown, Dawson demonstrated a switch from the “light color on the lid, dark color in the crease” routine—she used a light color on the browbone, as usual, but then blended a darker shade on both the lid and in the crease. I have deep-set eyes and I was advised to blend the dark color even a bit higher, onto the bottom of the brownbone.
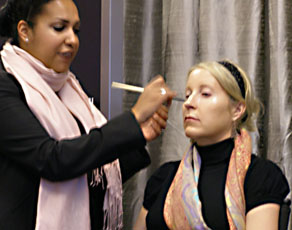
Bobbi Brown artist Suemar Dawson applies eye shadow.

Bobbi Brown artist Suemar Dawson applies eye shadow.

Step 9: Eye Liner

Dawson says the Black Ink gel liner is a basic color that every woman should own. But she demonstrated the Ivy gel liner, a gorgeous dark green shimmer (definitely an addition to my Christmas list), with a rounded-tip Ultra Fine Eyeliner Brush. Dawson blended the liner on the back of her hand and said application should begin at the outer corner of the eye. Don’t draw the line, she says, but rather “press” the brush along the lash line. When you reach the inner corner, you should switch the angle of the brush from above the lashes to right below the lashes (but still above the waterline) to taper the end of the stroke.

Step 10: Mascara

The final step promoted Bobbi Brown Everything mascara, which Dawson raved about. She said that multiple coats could be applied with losing softness and without flaking because of a built-in conditioner.
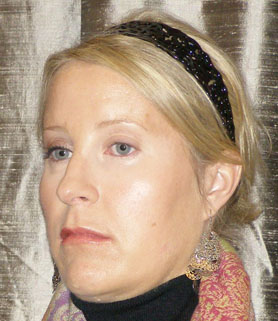
Only the right eye is done, showing the impact of liner and mascara.

Only the right eye is done, showing the impact of liner and mascara.

Overall, the class was well worth the $20 entry fee—especially since a goody bag was included with samples and an Everything mascara and attendees also received a full-size lipstick. The same week, Bobbi Brown Cosmetics also offered an Uber Master Class, which offered one-on-one makeover with national makeup artists, and was led by Kimberly Soane, Bobbi Brown East Coast Artistry Manager. Unfortunately, that class sold out quickly. Not that I would’ve been able to attend anyhow: That class cost $450.

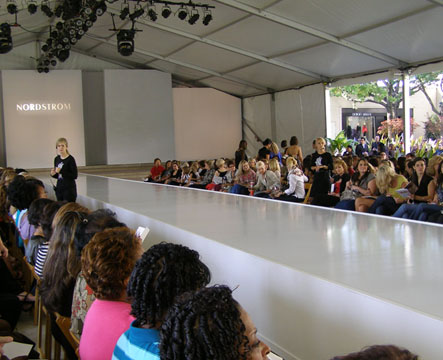
Nordstrom Beauty Trend Show tent

Nordstrom Beauty Trend Show tent

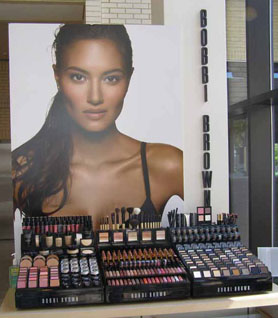
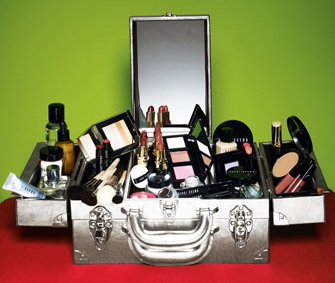
Wouldn't you like this to be your makeup kit?

The Nordstrom Beauty Trend Show was the event that first attracted me to NorthPark Center’s Fashion at the Park. The promise of “the season’s newest fashions, makeup, skincare and fragrances” was irresistible to a cosmetics lover such as I. So I bought my ticket (just $15) and was thrilled when it came in the mail with a hand-written note.

Saturday morning began with a free buffet of pastries, bagels, alcoholic drinks (maybe I’m a square, but 9 a.m. is a bit early for cocktails), coffee and water. Attendees also registered for bountiful gift baskets, which were awarded later in the show by handsome male models (?) in OU and UT T-shirts (a reference to the football game later in the day).

The show itself, however, was something of a disappointment. It basically turned out to be sales pitches for products in between short fashion show segments. And the sales pitches were mediocre; it seemed that most of the cosmetics/product reps were speaking extemporaneously, a technique which came off as simply unprepared and uninteresting.

MAC promotes its Gold Fever collection.

MAC promotes its Gold Fever collection.

The fashion show segments were intended to show the featured makeup looks (winter berries, smoky eyes, metallics) with related garments. The clothing was not couture, but the show’s stylists created looks with a surprising amount of flair and creativity. Prevalent trends were ombre, feathers, hats, patterned hose, mixing textures (such as tweed and leather), plaid and ankle boots.

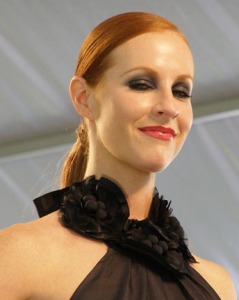
Smoky eye look by Chanel Beaute

Smoky eye look by Chanel Beauty

Of all the shows I have attended at Fashion at the Park, I did expect this one—a product-focused event—to offer a goody bag. This could’ve been done easily and, one would think, cheaply with Nordstrom shopping bags and samples from the brands. But instead the organizers chose to offer a cheap-looking pleather tote with a stamped “woven” texture as a giveaway. I didn’t attend the show solely to get something free, but Nordstrom missed an opportunity to put product samples directly in the hands of customers who had already demonstrated an interest in cosmetics by simply being at the trend show; samples would have been tangible reminders of the promoted products and would have likely fostered future sales.

Some free samples were mentioned in product presentations, so I assume that Nordstrom’s intention was to draw attendees to individual counters following the show and offer samples and an additional sales pitch at the counters. While this might have worked if the audience had been 25 people, it didn’t really work with an audience of a few hundred. Nordstrom’s cosmetics area post-show was a crowded din.

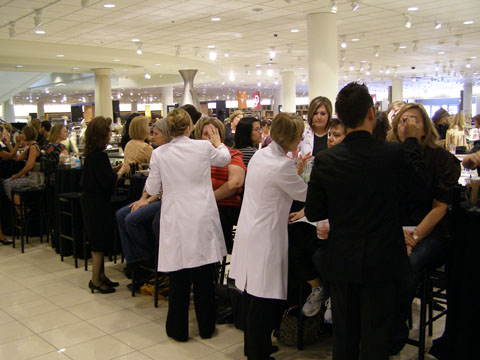
The edge of the melee at Nordstrom post-show.

The edge of the melee at Nordstrom post-show.

People were claiming their free pleather bags, or getting makeovers at the counters and in the aisle, or just milling around. Remembering which counters were offering free samples or demonstrations was a struggle (it should’ve been printed in the program as a checklist), much less wading through the throng to the counter and then finding an employee to wait on you. I left after a few minutes without claiming my free tote or any free samples.

View some of the fashion looks in the slideshow below.

In summary…

What Nordstrom did well:

  • Presented a variety of fashion looks that are on trend for this season.
  • Offered free makeovers following the show.
  • Offered a $15 coupon on any day-of-show purchases to offset the ticket price.
  • Offered generous baskets for a mid-show drawing.

What I think Nordstrom could improve on next season:

  • If possible, move to an indoor location again. Attendees would be more comfortable, and projections on the video screens—which are vital to seeing the makeup looks if you’re in the back row—would be visible, unlike this season.
  • Presenters should be well-rehearsed.
  • A goody bag of samples would reinforce the presentations and convert into sales.
  • Any counters offering free samples or services should be clearly noted in the program, possibly in a checklist form, to encourage show attendees to visit the counters.
  • Temporarily expand the makeover/cosmetics area even further; the crush of people following the show was offputting to anyone who actually wanted to shop the cosmetics area.
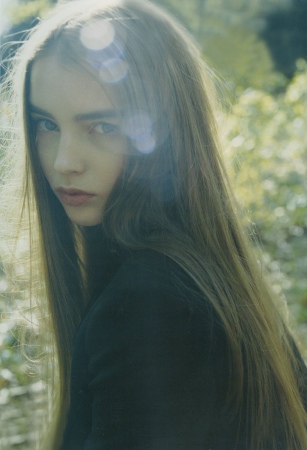
Photo by Yelena Yemchuck/DNA Models

Ali Michael. (Photo by Yelena Yemchuck/Courtesy of DNA Models)

I wrote this piece originally for the Dallas Observer blog Unfair Park, but since it was not published there, I am posting it here. —Michelle

Ah, this takes me back. As I search for my seat once again in NorthPark Center’s Fashion at the Park tent, the emo sounds of Dashboard Confessional’s “Screaming Infidelities” pour out of the speakers. In 2001, when this song debuted, I had just graduated from college, moved to Dallas and had a bright future ahead of me as a shill for the tanning industry. As I look around at the kids in the tent—lots of teens and tweens are here to ogle/support the young finalists of the Fashion!Dallas/Kim Dawson Model Search—I realize that most of them were probably in elementary school when this song was big. I also wonder how many of them snagged a glass of Champagne from the Moet & Chandon trays circulating through the Sunday afternoon crowd.

Perhaps as a function of the lower average age in the tent and the time of day, jeans are out in full force. Still, some attendees are dressed to the teeth. Since I welcome any opportunity to forgo heels, I gotta respect the Sunday-afternoon stiletto wearers. I raise my Champagne flute to you, ladies; you have stronger ankles and a higher pain threshold than I do.

Among the teen onlookers in the crowd is a face familiar to both Dallas and the fashion world: 2006 F!D/KD Model Search winner Ali Michael, who has since walked runways for Chanel, Dior, Yohji Yamamoto, Lanvin and more. Yet, aside from the bold eyebrows, the willowy frame and the leather Prada hobo slung over her shoulder, this gum-popping 18-year-old looks just like a regular teen. Her presence is apparently a pleasant surprise to model search organizers Tracy Hayes and Lisa Dawson, who introduce her as they introduce the 10 finalists. The male models seem to get the most applause and cheers from the audience when the finalists walk the runway (and someone screams “Sexy boy!” when Michael Fjordbak struts).

Dawson goes on to explain the role that technology played in the readers’ choice vote: This year, text-message votes (which were unlimited) outnumbered mail and online votes, and the final vote count far surpassed previous years’. 2007’s readers’ choice winner won with 8,000 votes; this year’s winner had more than 80,000. A friend of finalist Fjordbak confesses to text-voting for him 40 times in one day. And the convenience of text-messaging isn’t the only technology that drove votes: A few of the finalists—including Kyle Ellison, Diaby Mo Jr. and Alex Long—set up “vote for me” Facebook groups with hundreds of members to remind fans to keep the text votes rolling in.

In the end, it’s no real surprise when Mo is announced as the readers’ choice winner and Ellison is selected as the winner of the grand prize of $1,000 in NorthPark Gold (a mall shopping spree, basically), a Toni & Guy national ad campaign and a modeling contract. But Dawson assures the crowd that all of the finalists are talented. In fact, she told Unfair Park that the Kim Dawson agency might even sign them all. All in all, F!D/KD Model Search’s first year with a live audience is a huge success in Dawson’s eyes. “I am amazed at what it’s become,” she says. “How are we going to top this?”

Sorry I’ve been so conspicuously silent in the past few days. I’ve been covering Dallas’ “fashion week,” called Fashion at the Park, for the Dallas Observer‘s blog Unfair Park. While most of the collections shown are Fall 2008 (rather than the Spring/Summer 2009 collections seen at New York, London, Paris and Milan fashion weeks), Fashion at the Park still puts on quite a show.

While I have seen many of the collections online, it’s still exciting to see them in person. And of course, there’s free Champagne.

Cruise over to Unfair Park to read my posts about the Roberto Cavalli show, the CFDA/Vogue Fashion Fund show (got to meet the Marchesa designers, woo-hoo!)…and more to come.

Also, see my coverage on this blog of the Fashion!Dallas/Kim Dawson Model Search.

Perusing the Neiman Marcus Christmas Book every year is, in itself, an act of decadence. I feel absolutely ashamed of myself as I “ooh” and “aah” over the gorgeous clothing and handbags.

But before I look at any of that mundane stuff, I flip immediately to the fantasy gifts—for someone out there, these gifts aren’t fantasies, but for 99% of us, they are—and immediately begin to drool. This year’s gifts are decidedly fantastic, including a $110,000 motorcycle, life-sized Lego portraits ($60,000), an 18,000-piece record collection ($275,000), actual medieval-era jewelry (beginning at $25,000), and the centerpiece, a 12-to-15-horse Thoroughbred operation ($10 million).

After I put my eyes back in my head, I find another treasure that, compared to the preceding uber-luxe gifts, is an absolute steal: A stately silver leather train case packed with more than 50 items from Bobbi Brown’s cosmetics line. The price for this little beauty? $2,000.

Photo courtesy of Neiman Marcus

Photo courtesy of Neiman Marcus

I don’t want to bore you with the entire list of what’s in the case (though you can see that here), but here are some highlights:

• 3 pan palette
• 6 pan palette
• Extra SPF 25 Tinted Moisturizing Balm in Light to Medium
• Eye Shadow in Bone
• Shimmer Wash Eye Shadow in Rose Gold
• Metallic Eye Shadow in Lavender
• Long-Wear Cream Shadow in Galaxy
• Bronzing Powder in Light
• Pot Rouge in Pink Raspberry
• Shimmer Brick Compact in Copper Diamond
• Shimmer Lip Gloss in Pink Sugar
• Lip Color in Slopes
• Metallic Lip Color in Kir
• Long-Wear Gel Eyeliner in Chocolate Shimmer Ink
• Everything Mascara in Black
• Lash Glamour in Smoke
• Instant Long-Wear Makeup Remover
• Hydrating Eye Cream
• Overnight Cream
• Intensive Skin Supplement
• Almost Bare Fragrance
• Buffing Grains for Face
• Concealer Brush
• Blush Brush
• Face Blender Brush
• Ultra Fine Eye Liner Brush
• Eye Shader Brush
• Bronzer Brush

Do you have a best friend who loves Bobbi Brown? Is that best friend me? If anyone needs my address so they can send me this gorgeous gift, drop me a note.

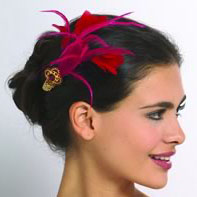
Since so many of you enjoyed my post about Kenley Collins’ fascinating fascinators, here’s a link for the crafty among you: Simplicity Patterns’ How to Make a Feather Fascinator. Basic sewing skill is required, but if you can sew on a button, you can make this fascinator. The only materials you need are a plastic or metal hair comb, assorted feathers, one decorative shank button, a hand sewing needle, thread and a few seed beads.

While you’re at the Simplicity site, check out their other free sewing and crafts patterns, such as an obi belt, a skirt made out of old jeans, and fairy or bat wings.