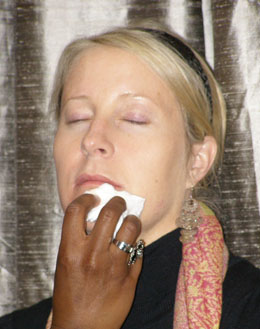
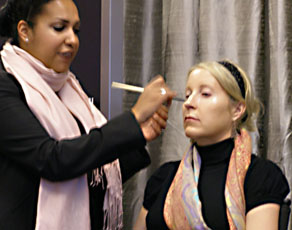
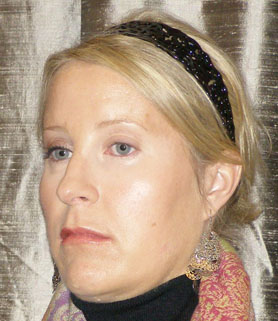
As part of NorthPark Center’s Fashion at the Park, I had the chance to attend an event called “Bobbi Brown: Runway to Reality” in a private meeting space at Nordstrom. The title was a misnomer, as the event didn’t focus on converting extravagant runway looks to everday looks. Instead, the demonstration—led by Suemar Dawson, a Bobbi Brown artist who often works directly with Brown herself—centered on The 10-Step Beauty Guide. Using an audience member as a model, Dawson led us through creating a basic, neutral look.
Sounds deceptively simple, but I actually learned a lot. The setting was intimate (fewer than 30 other women) and we were encouraged to ask questions. Dawson said the Bobbi Brown philosophy relies on “simplified” products (such as moisturizers with built-in primers and anti-aging lipsticks) and the idea that the makeup looks natural enough that “you should be able to stop at any step.” If you don’t have time for all 10 steps, Brown suggests concealer, blush and lip gloss as the top three for a “instantly pulled-together look.”
Pre-Makeup
The seminar began with the admonishment that a lipstick or eyeshadow probably won’t change your life—but proper hydration can. Extra Face Oil, for instance, can add a soothing boost when layered over your everyday moisturizer. This oil is not slick but is “dry,” absorbs quickly and has a herbal/lavender scent. Dawson said, chuckling, that she thinks of Hydrating Eye Cream, which has a built-in primer, as the “Spanx of cosmetics”—lifting, defining, hiding flaws. The eye cream provides a smooth base for the next step, correction and concealing.
Step 1: Concealer
I have always thought a yellow-based concealer should go directly on bluish undereye circles, but Dawson said that the combination (blue + yellow) can simply give the undereye a greenish tint. For dark circles, start instead with a pink-toned corrector and then follow with a yellow-based concealer for best coverage.
“Concealer is the secret to the makeup universe,” said Dawson, and indeed, she spent the most time on the concealer step of the demonstration. According to Bobbi Brown, undereye concealer should be one shade lighter than the surrounding skin. (Again, my misconception had been that concealer should exactly match the skin.) Dawson said the brightest spot on the face should be the browbone and the second brightest the undereye area, hence the need for a slightly lighter concealer. When choosing a concealer, Dawson tells makeup artists to select the shade they’re scared of—that is, the one that looks a bit too light.
Step 2: Foundation
I’ve never known whether it’s better to use your fingers, a sponge or a foundation brush. Dawson suggests that for dry skin, finger application is best because it warms up the foundation and adds a bit of oil from the fingers. For oily skin, sponge application helps keep finger oils from getting on the face. She says that she then likes to finish with a brush to blend in foundation.
Using a full-coverage foundation over the entire face creates too much of a masklike effect, said Dawson. She recommended foundation layering: start with a tinted moisturizer/sheer foundation and then go back and hit any trouble spots with a Foundation Stick or Blemish Stick.
Step 3: Powder
Fortunately, the Creamy Concealer Kit includes matching powder to set the concealer for longer wear. Dawson suggests that the rest of the face should only be powdered in oily spots (not the cheeks) for a more natural glow.
Step 4: Blush
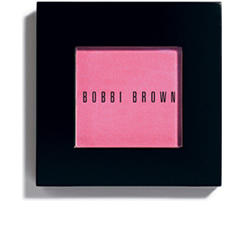
I tend toward earthy shades when I choose blush. Never would I think of picking up Bobbi Brown’s Pale Pink Blush, which in the compact looks like a neon Barbie color. What’s amazing is that both the model (fair-skinned blonde) and Dawson (African-American brunette) were wearing the shade, and it looked great on both of them!
Step 5: Lipstick/Gloss
Bobbi Brown just released a new Lip System, which is a colorwheel that helps choose your perfect lipcolors based on, well, your natural lip color. Dawson touted the Creamy Lipcolor, which she said has anti-aging ingredients. (The cost of the event included a lipstick of our choice: I selected Creamy Lipcolor in Baby.)
Step 6: Lipliner
Dawson said it’s OK to not use lip liner in your everyday look, as long as you don’t have concerns about feathering. If lipstick feathering is a problem, she suggested using both a lip liner and also patting a ring of foundation right around the edge of your lips.
Step 7: Brows
The two most common brow problems Dawson encounters are thin, over-tweezed brows and “the tadpole,” a brow that’s thick near the nose but trails sharply down to nothing. Brow pencils aren’t Dawson’s favorite, because they are often too creamy and will “melt” off too quickly. (Dawson says Bobbi is developing a pencil that has a powdery texture that would be appropriate). Any of the regular eyeshadows, applied with an angled brush can work for brows. She recommends cooler shades for every skin tone (rather than warm or reddish shades) and says that blondes can even use gray shadow.
Step 8: Eye Shadow
Sorry to say, most of Bobbi Brown’s eye shadows do nothing for me, since I like crazy, glittery MAC colors. If you’re into the muted palette of Bobbi Brown, Dawson demonstrated a switch from the “light color on the lid, dark color in the crease” routine—she used a light color on the browbone, as usual, but then blended a darker shade on both the lid and in the crease. I have deep-set eyes and I was advised to blend the dark color even a bit higher, onto the bottom of the brownbone.
Step 9: Eye Liner
Dawson says the Black Ink gel liner is a basic color that every woman should own. But she demonstrated the Ivy gel liner, a gorgeous dark green shimmer (definitely an addition to my Christmas list), with a rounded-tip Ultra Fine Eyeliner Brush. Dawson blended the liner on the back of her hand and said application should begin at the outer corner of the eye. Don’t draw the line, she says, but rather “press” the brush along the lash line. When you reach the inner corner, you should switch the angle of the brush from above the lashes to right below the lashes (but still above the waterline) to taper the end of the stroke.
Step 10: Mascara
The final step promoted Bobbi Brown Everything mascara, which Dawson raved about. She said that multiple coats could be applied with losing softness and without flaking because of a built-in conditioner.
Overall, the class was well worth the $20 entry fee—especially since a goody bag was included with samples and an Everything mascara and attendees also received a full-size lipstick. The same week, Bobbi Brown Cosmetics also offered an Uber Master Class, which offered one-on-one makeover with national makeup artists, and was led by Kimberly Soane, Bobbi Brown East Coast Artistry Manager. Unfortunately, that class sold out quickly. Not that I would’ve been able to attend anyhow: That class cost $450.


